Changing Bundle ID and Package Name in Flutter
Android
-
Open the Flutter project in Android Studio or your preferred text editor.
-
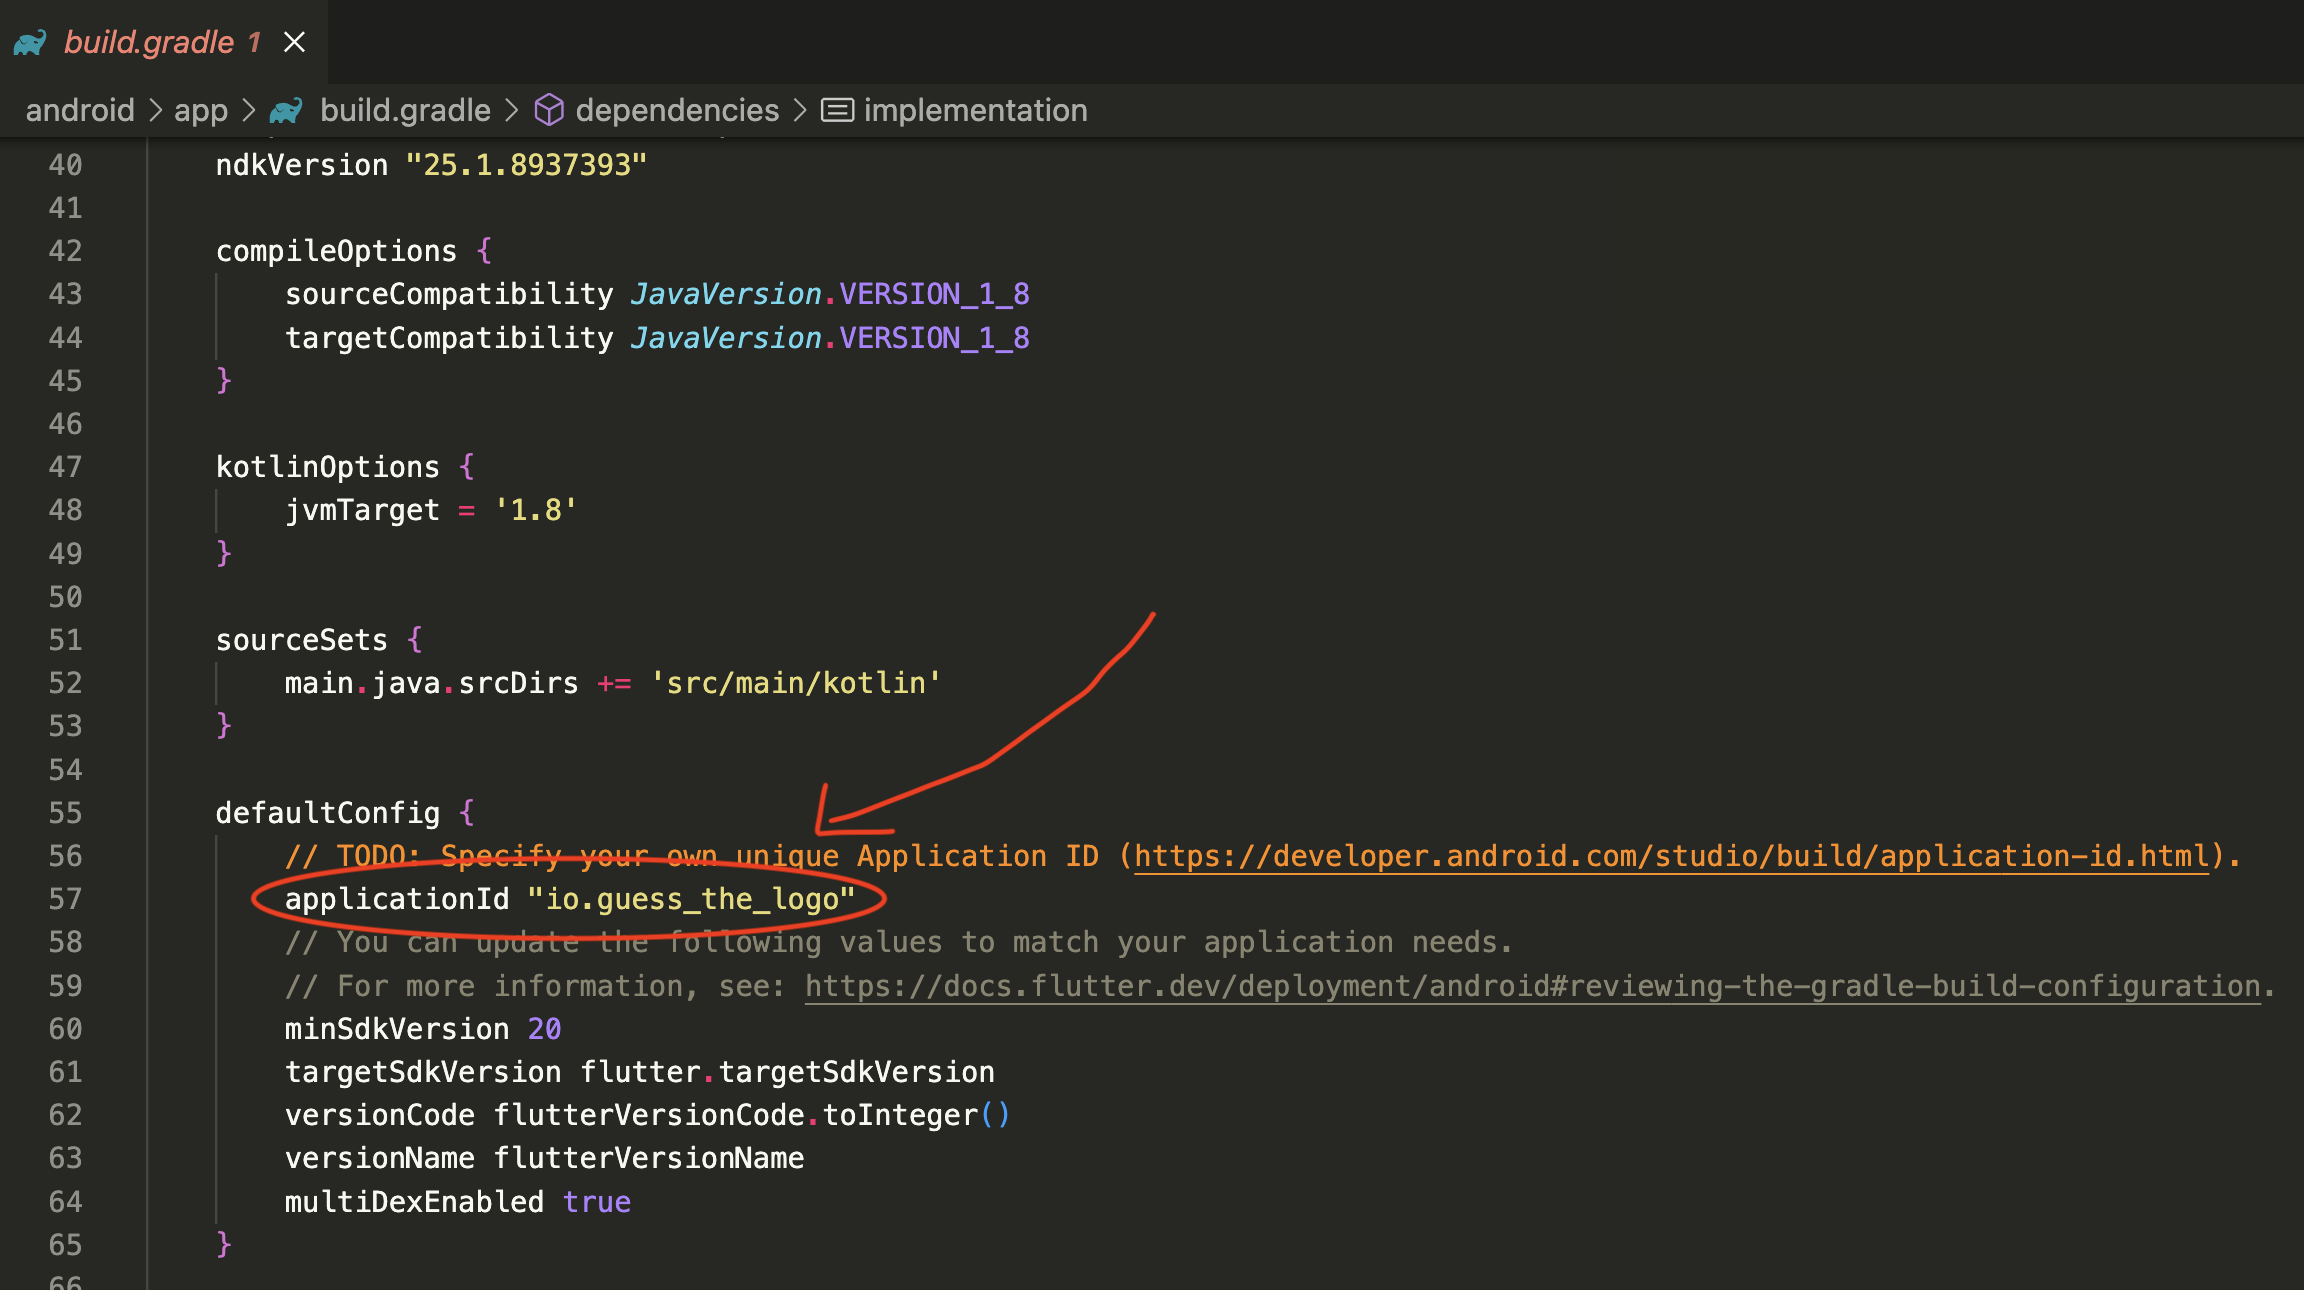
Navigate to the
android/appdirectory. -
Open the
build.gradlefile. -
Locate the
defaultConfigblock. -
Change the
applicationIdvalue to your desired package name. -
Save the file.
-
Navigate to the
android/app/src/maindirectory. -
Open the
AndroidManifest.xmlfile. -
Update the
packageattribute in themanifesttag with your desired package name. -
Save the file.
Kotlin Package Import and Folder Structure
-
In Android, the package import and folder structure are determined by the package name specified in the
build.gradlefile. -
The Kotlin package import and folder structure will match the package name you set in the
build.gradlefile. -
For example, if your desired package name is
com.example.myapp, the Kotlin package import and folder structure will be as follows:-
Package Import:
import com.example.myapp.* -
Folder Structure:
app/src/main/kotlin/com/example/myapp
-
iOS
-
Open the Flutter project in Xcode or your preferred text editor.
-
Navigate to the
ios/Runnerdirectory. -
Open the
Info.plistfile. -
Locate the
CFBundleIdentifierkey. -
Change the value of the
CFBundleIdentifierkey to your desired bundle ID. -
Save the file.
Updating Flutter Code
-
Open the Flutter project in your preferred text editor.
-
Open the
pubspec.yamlfile. -
Locate the
namefield. -
Update the value of the
namefield to your desired package name. -
Save the file.
Clean and Rebuild
-
In the terminal or command prompt, navigate to the root directory of your Flutter project.
-
Run the command
flutter cleanto clean the project. -
Run the command
flutter buildto rebuild the project with the updated bundle ID and package name. -
Once the build process is complete, you can run your app on Android and iOS devices with the new bundle ID and package name.